
Step by Step Painting of Paganus – the PRELUDE
Technique: wet blending with acrylic
(two little days of work)
Hi, my name is Julien Reymond and I am glad to be asked by Jay to do my first article in English. It was not so easy for me to write but it’s a pleasure and a good opportunity to share my painting process with the community. In this part I would like to offer you the global step by step of the Paganus project and although I cover a lot here I have much more to show you, maybe another two parts, enjoy!
The choice of the miniature
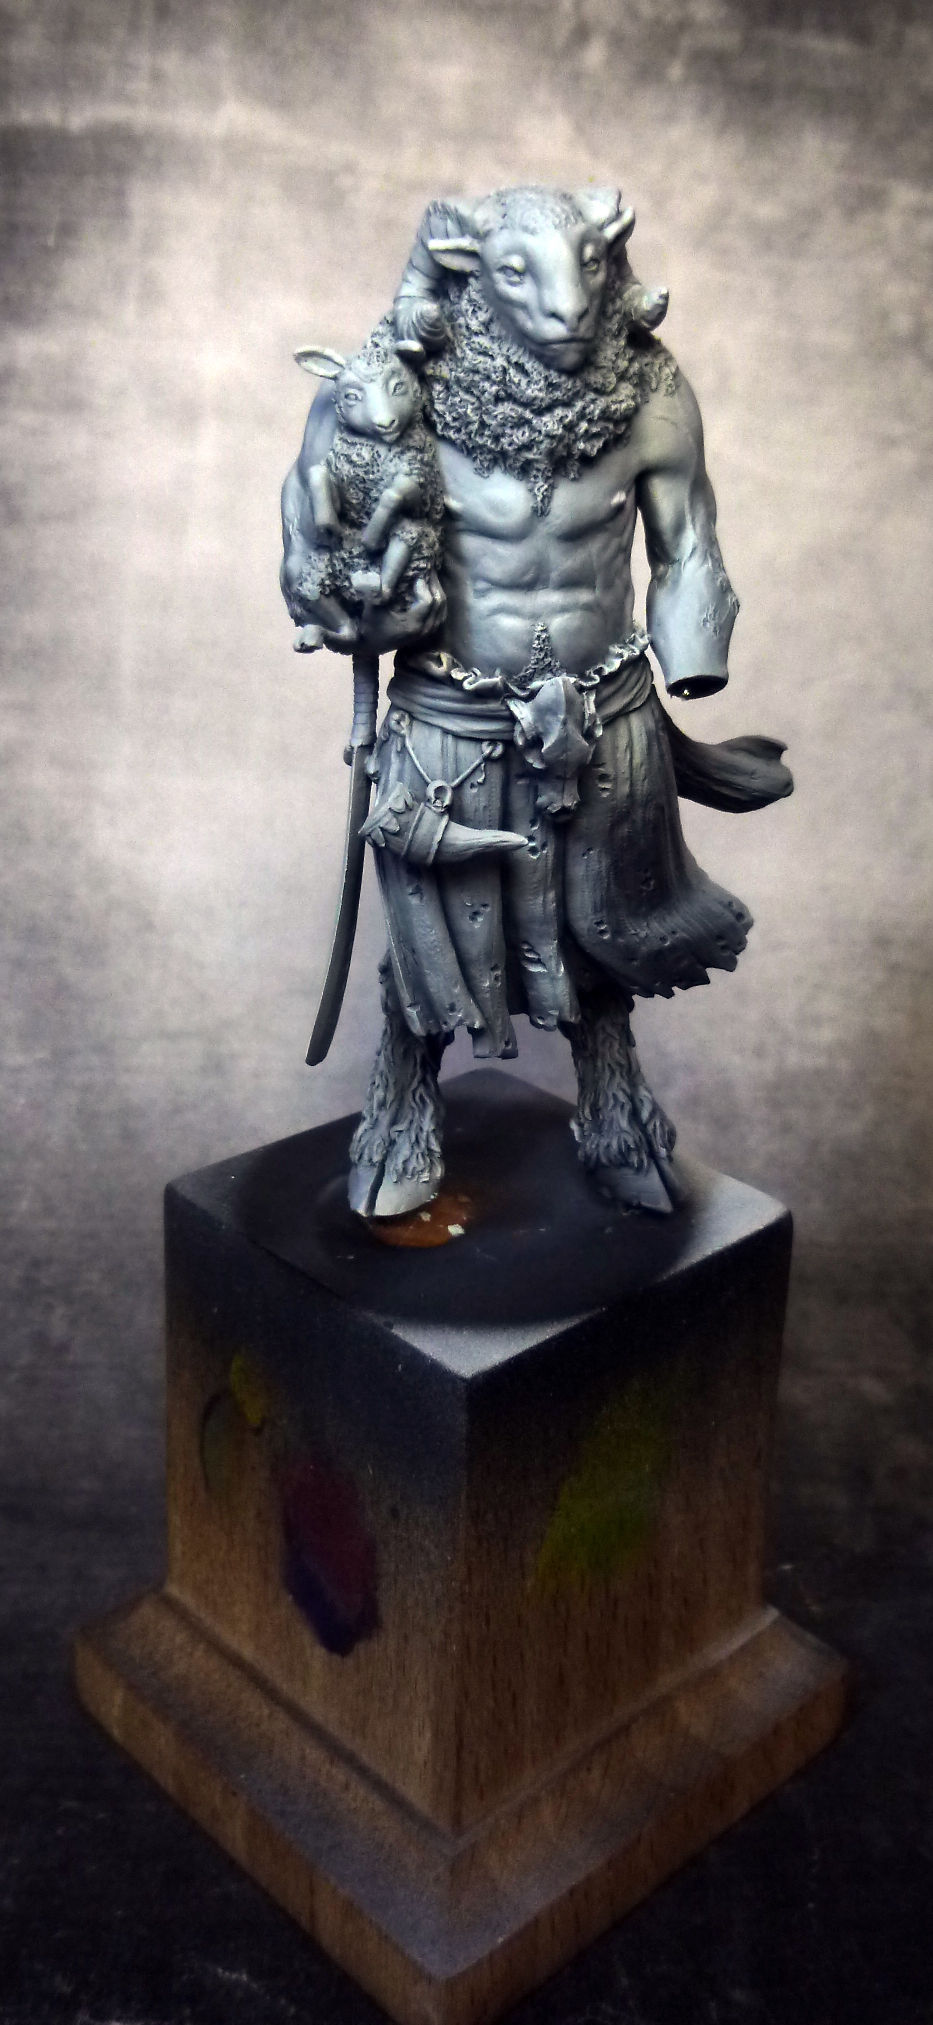
Choosing a mini mean for me to choose a piece that make you feel something. A piece that motivate you to paint it with pleasure. It’s one of the most important things. I thought that Paganus was a great choice for an article and I really want to paint it. A really nice piece sculpted by Benoit Cauchies, based on the Concept Art by Stefano Moroni and released by my friends from Aradia Miniatures.

Furthermore the scene really fitted some present context yet on a different point. So it was interesting to do it.
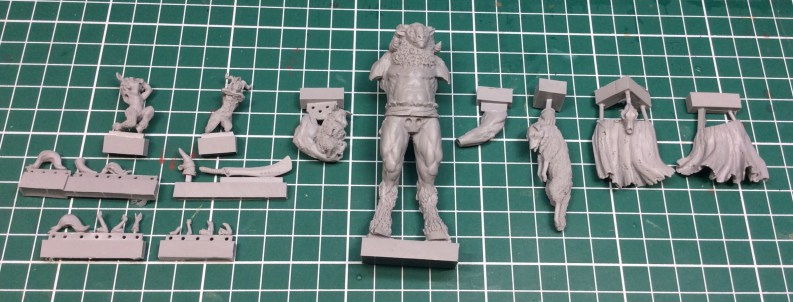
This kit give you a lot of different possibilities due to all the protagonists in it.
Preparation
After a good first session of assembly, preparation and deburring (deflashing). (I do not hesitate to return severals times on this point until satisfied) I am ready to build my project. I take time to look at the piece and to let my imagination come forth, to let flow the creativity process. I think and look around me for what could be useful in this project. I want to start my flesh from a tint of green. This will fit nicely with the beautiful red color base I have. The shape of both of them give a nice distribution in height.
The choice of the base is always important to fit well with the mini and to put it in perspective and increase it’s value. After a small test for optimal positioning, we can drill and fix the mini. To protect the varnished red flat parts, I cover them with masking tape.
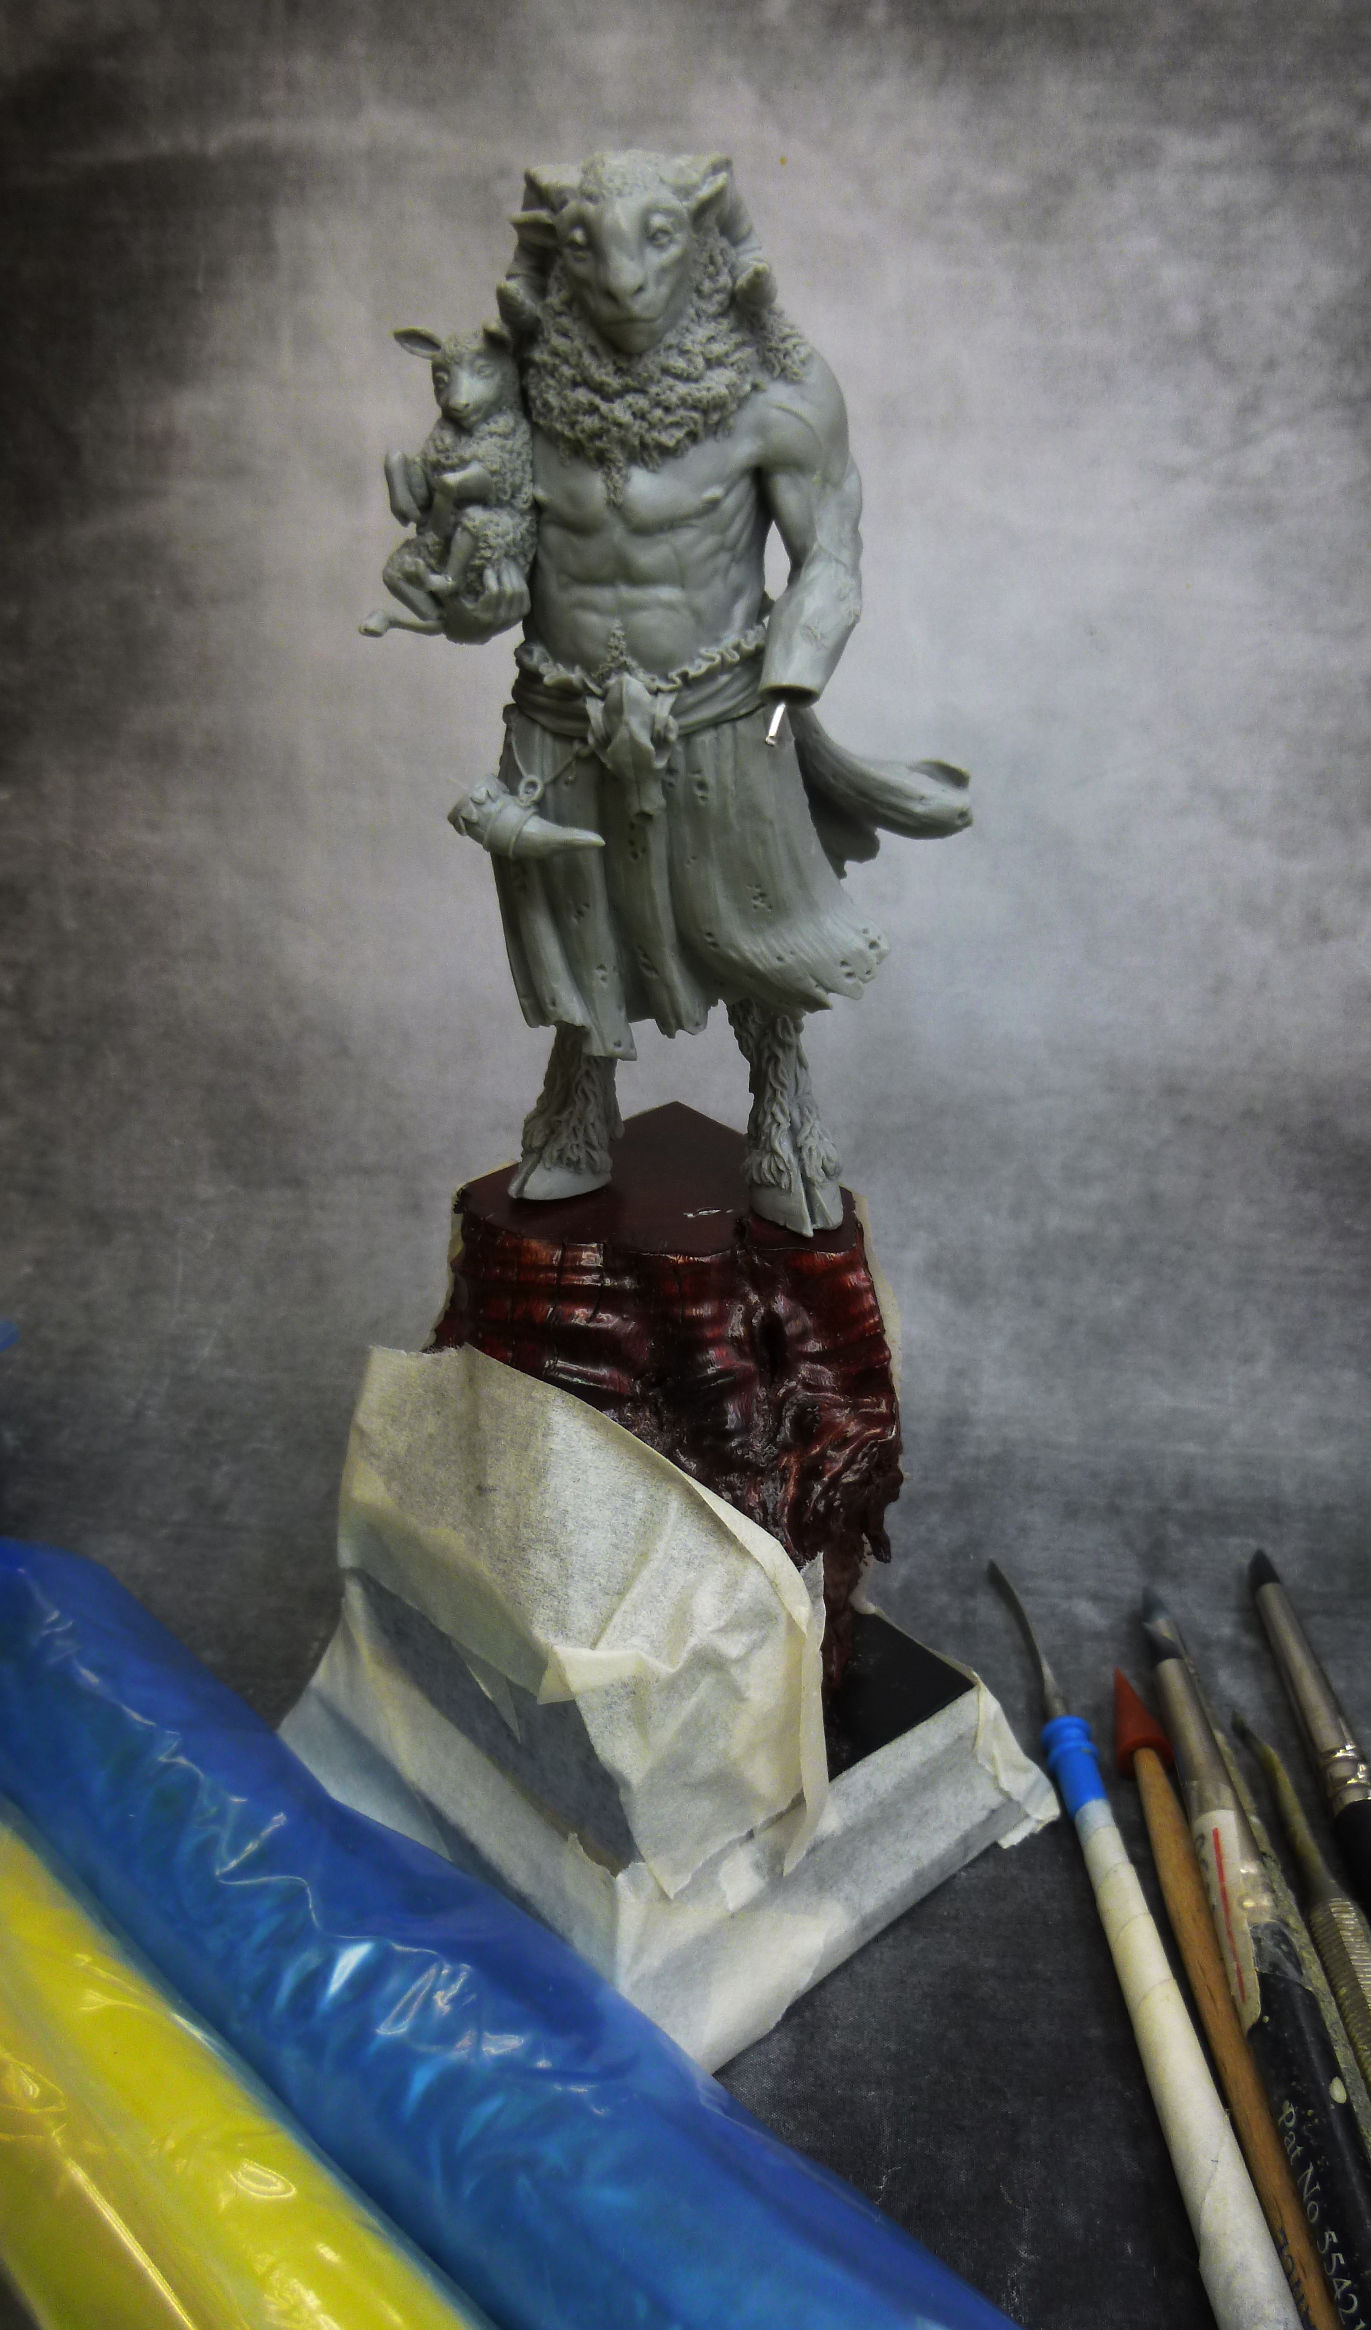
I attack then the texture of the ground. I use milliput that I arranged and then leveled a little bit randomly. Once I am satisfied, some varying grades of gravel and sand is added.
I add the others part and the protagonists to the scene, to see if it’s well balanced and then begin attaching small grass tufts and twigs with superglue (one by one). This will add a little bit of life and realism to the base. Fine sand and gravel are then fixed with Gravels and Sands from Ak or Mig, to seal and make some zones even more realistic and to add variation.
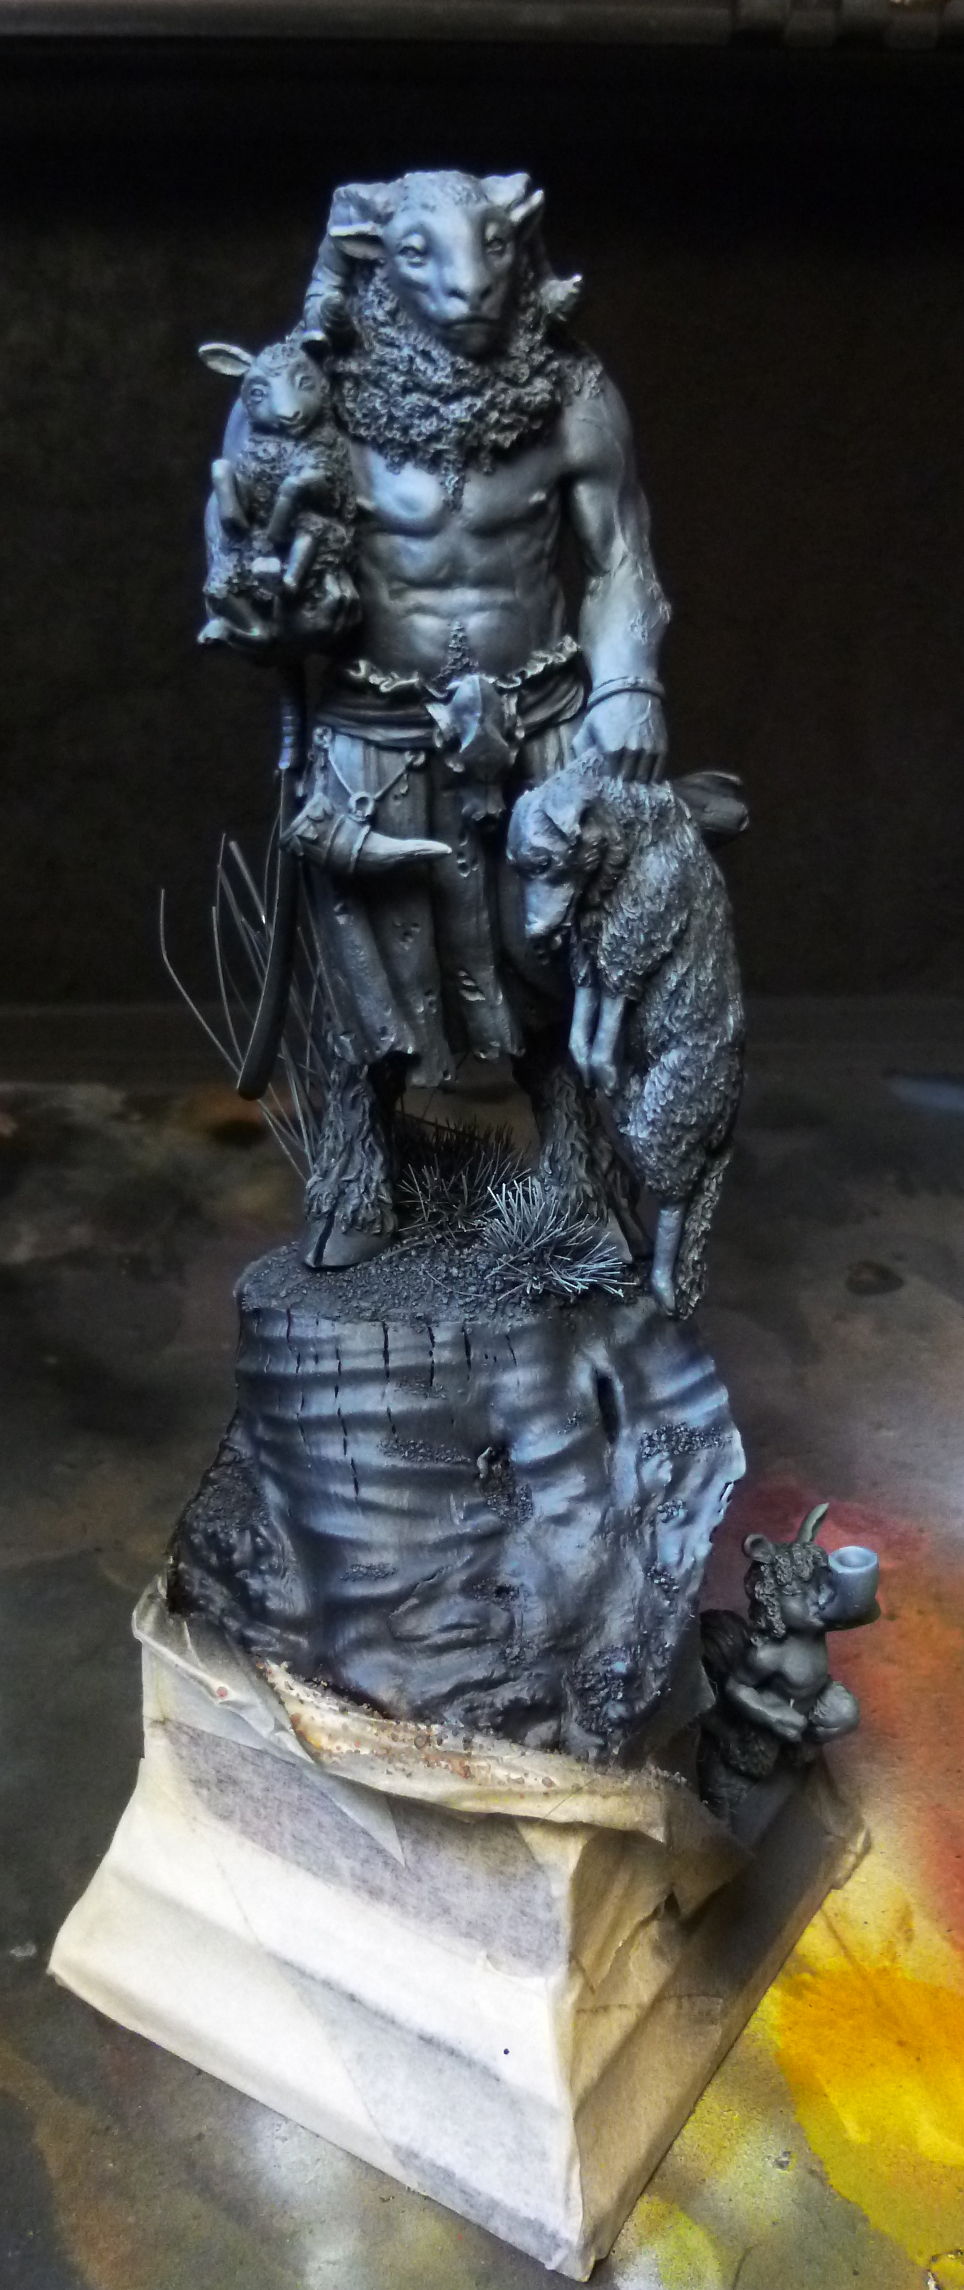
I take a little time for the last small verification for the deburring before doing the base coat. I take a lot of time for the preparation of my minis. When everything is good, let’s go for the pre-shading with airbrush.
Pre-shading
To reach well every part and to simplify my black basecoat, I don’t hesitate to work in separated pieces or sub assemblies.
Then I carefully apply my lights following a zenithal lighting approach. I focus it more upon the front part.
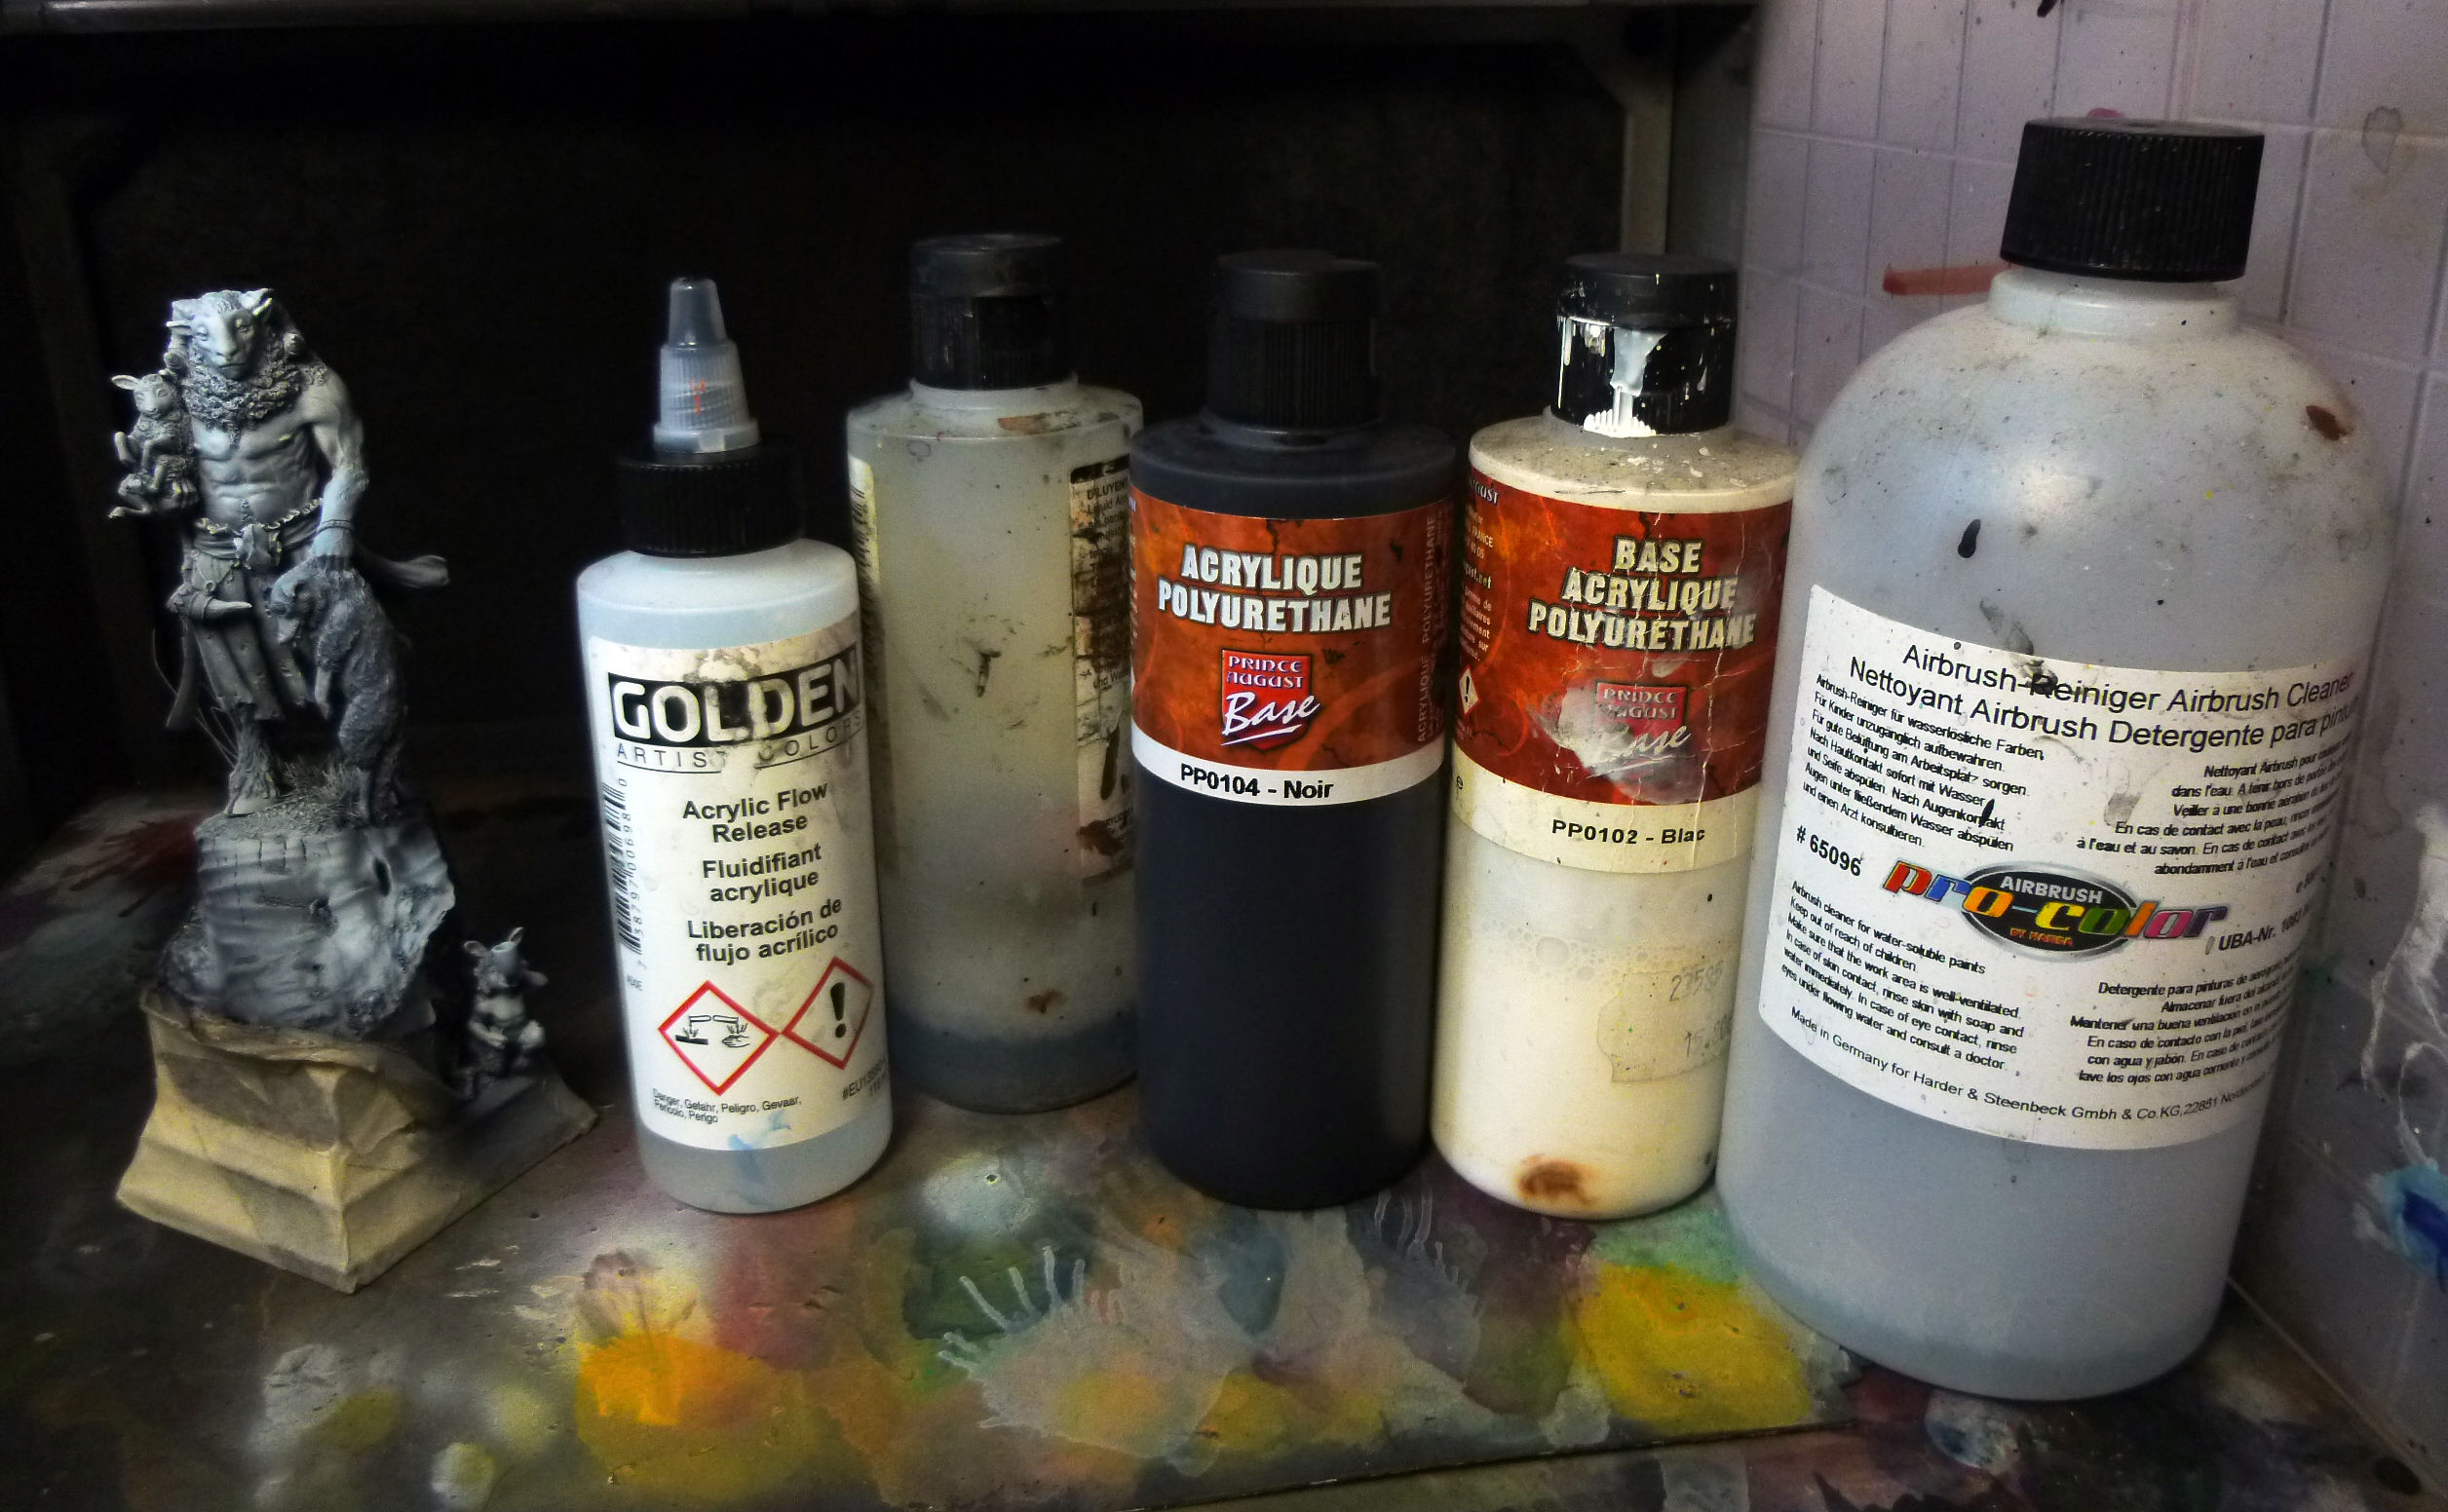
Tips: Here are the products I use:
-Flow release Golden (a little bit to help to dilute the paint)
-Personal mix (for paint dilution. Washes window liquid 80 % and 20 % demineralized water)
-Base coat: polyurethane Prince August white and black
-Cleaner Hansa (found at Aerodiscount)
Painting process
For this character, I have opted for a more spontaneous painting following a let it go approach. I want to, get a strong pigmentation of my colours than a pastel approach for the flesh, and to play between flat and shine of the colours. In general, I start directly with airbrush to make a big sketch of the colours repartitions (this method will be for a next article). This will make a more pastel approach.
To follow my way, I use wet blending technique. The pre-shading allows me to distribute my lights and to give me a global approach of the project. After a small study of my pre-shading I take my colours and begin to arrange my wet pallet. Clear, dark, saturated colours come to the palette with feeling and spontaneity.
Different paints used: turquoise, greens, phtalo blue, purple, pink, yellow, grey, tints very clear and two whites (the Old holland really shiny and the Golden more matt). I use various brands according to their properties and I don’t hesitate to mix them to cross and use there different properties.
Golden, Jo Sonja and Old holland put a little more time to dry. The first, very rich, can be quite satin, whereas the second are almost quite matte. The white of Old Holland is very impacting due to its’ shine and strong pigmentation. Games Workshop and P3 have very interesting and useful colours too.
For more simplicity and to not destroy plants during the painting process, I arrange the mini on another base.
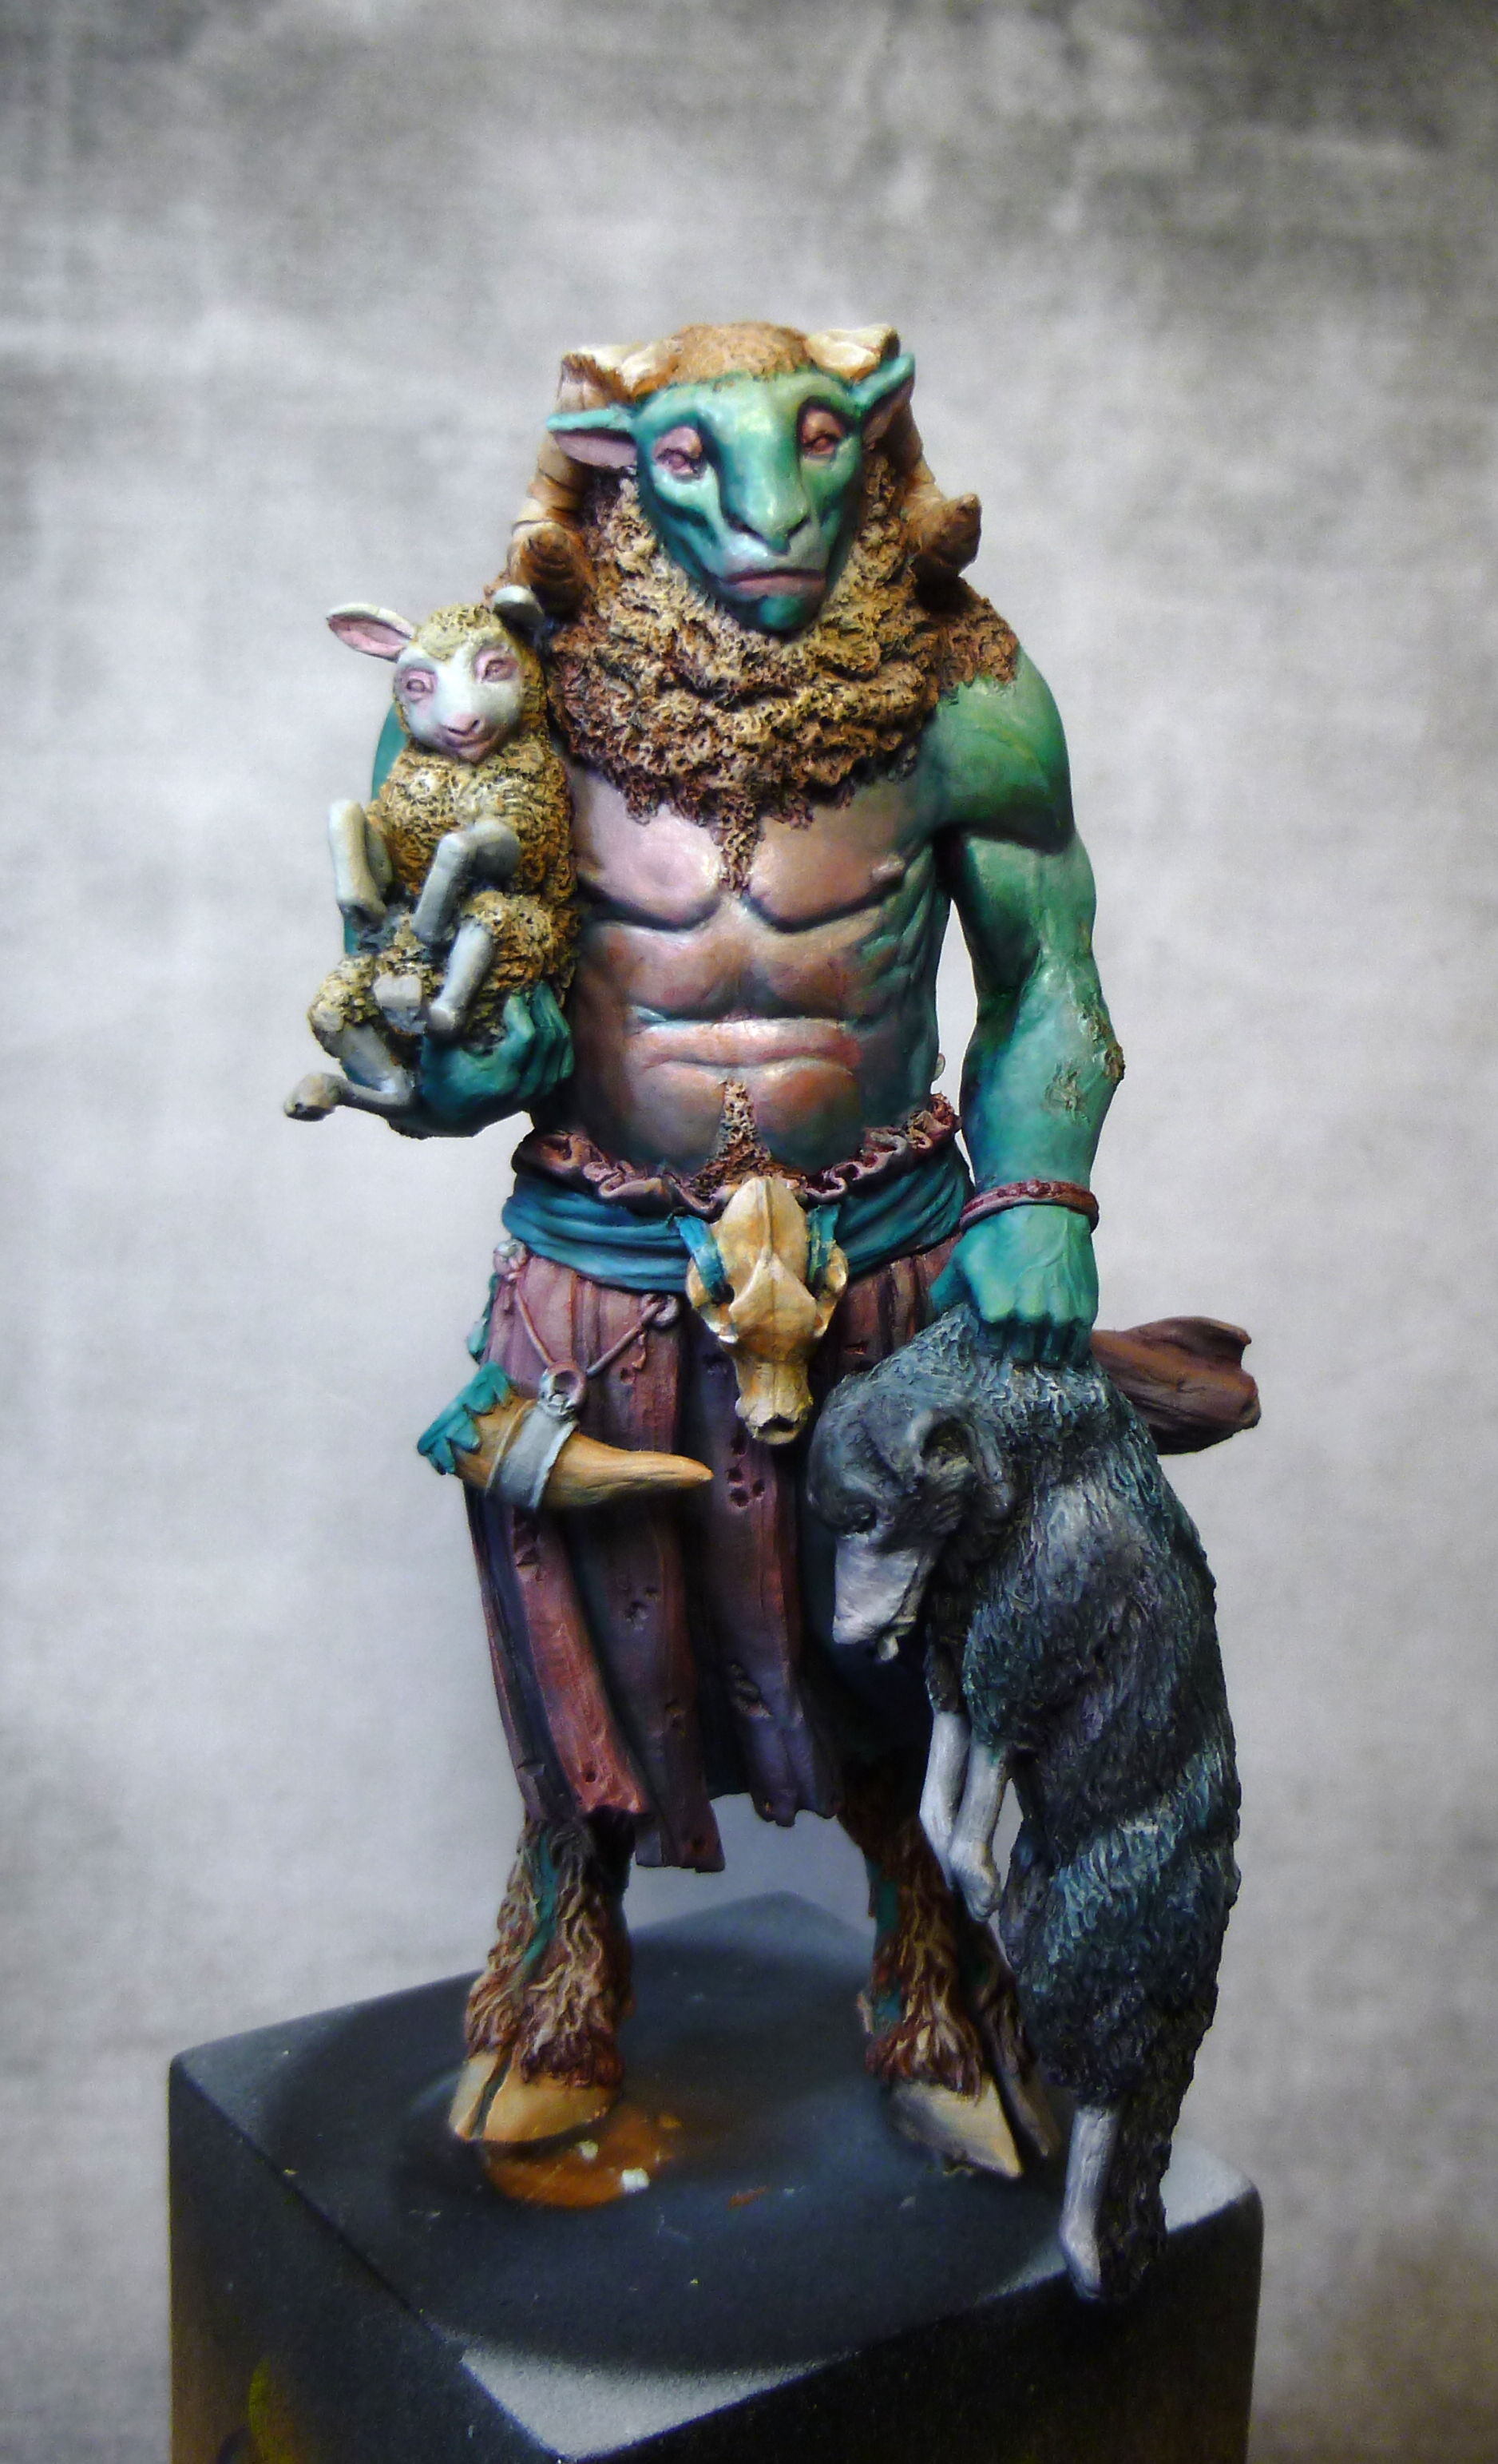
First try of a mixture of green and turquoise shadowed by brown purple. I adds some light while the paint is still fresh. I test some warm colours on the belly while keeping my green in his shadows. You can see here mixture for these two parts.
This start to please me so I could go to work the entire piece. I test zones likely to be treated in pink.
Little step by step for went blending technique
I put some paint (not too diluted), clean my brush, dry it and take the other colours. I have the choice to blend it directly with the other colours or to place it in a dry part, then clean and dry the brush and come back to smooth them. I place my green on the upper part, with a transition of a turquoise & darker green. I had pink/purple on the butt and on the back of the elbow.
I come back to add purple brown in the shadows and I try to smooth them. I highlight by pulling off the paint (shadow to light. I put the paint, clean the brush and come to pull off the paint). Then same process is done to the leg
I’m continuing to block in my colour. I work more on a global approach to search for colour harmony.
I start to like the green and the pink of the flesh, the orange-colored yellow of the furs and this purple blue-green in the shadows. So I continue to arrange my colours, my shadows and lights here and there.
I am pleased with the global aspect so I add the wolf to see which colours could be suitable for him.
Tips: The grey colour of element could help to find the adequate colours for it. I find the opposition of dark/cold and light/warm between the wolf and the small sheep very interesting.
The base
I decide to switch to the base before doing the details and the polishing of the mini. I could start to work on the global harmony of the whole project. This will help me to be sure that all elements fit nicely together. I use wet blending with the colour used upon the mini a little bit de-saturated by some grey. (Phtalo Blue, Red Brown…)
I reworked some lights on the stone and to the vegetation. I have an overall look to the project now.
I begin to remove the masking tape to recover the colour of the base and try to harmonise the adjacent areas by glazing them with a red tint (like Dark Flesh). The project is near 50% done!
In the next article I will have to treat more in details each part and to refine the blending and the whole harmony.
Tips: To progress in my painting process I alternate a let it go approach to a more technical approach. When I feel I am losing one I move to the second. I hope this article will be useful. Don’t hesitate to give me feedback to make me improve my way or how I create my articles. Next time I will works more on the picturess, they are not top. It’s not easy, with the spontaneity of wet blending to stay in the painting process while you have to take images.
The end on the next episode! Maybe!
Cheers Julien